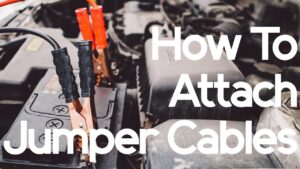
If your car won’t start due to a dead battery, learning how to attach jumper cables can get you back on the road in minutes. This simple guide will walk you through the safest and most effective way to connect jumper cables, even if you’ve never done it before.

How to Attach Jumper Cables
🔧 What You Need
Before you begin, make sure you have the following:
A set of jumper cables
A second vehicle with a fully charged battery
Safety gear (gloves and eye protection recommended)
⚠️ Important Safety Tips Before You Start
Never touch the metal clamps together while the cables are connected to a car.
Turn off both vehicles before connecting cables.
Do not smoke or use sparks near the battery.
Always follow the correct connection sequence to avoid damage or injury.
✅ Step-by-Step: How to Attach Jumper Cables
Step 1: Position the Vehicles
Park the two cars close together, nose-to-nose or side-by-side, but do not let them touch. Put both vehicles in park (or neutral if manual) and engage the parking brakes.
Step 2: Identify Battery Terminals
Open the hoods and locate the batteries. Find the:
Positive terminal (+) — often marked in red
Negative terminal (–) — usually marked in black
Step 3: Connect Jumper Cables in the Correct Order
Red clamp to dead battery (+)
Connect the red (positive) jumper cable clamp to the positive terminal of the dead battery.Red clamp to donor battery (+)
Connect the other red clamp to the positive terminal of the good battery.Black clamp to donor battery (–)
Connect the black (negative) clamp to the negative terminal of the good battery.Black clamp to unpainted metal on dead car
Connect the final black clamp to a bare metal surface on the dead car’s engine block or chassis — away from the battery. This acts as a ground and helps prevent sparks.
⚠️ Never attach the last black clamp to the dead battery's negative terminal — it could cause an explosion.
Step 4: Start the Donor Car
Let the car with the working battery run for about 2–3 minutes to charge the dead battery.
Step 5: Start the Dead Vehicle
Try starting the car with the dead battery. If it doesn’t start, wait another few minutes and try again.
Step 6: Disconnect in Reverse Order
Once the dead car starts:
Remove the black clamp from grounded metal
Remove the black clamp from the good battery
Remove the red clamp from the good battery
Remove the red clamp from the now-running vehicle
Avoid letting the clamps touch until they’re all disconnected.
🧼 Aftercare: What to Do Next
Keep the jumped car running for at least 15–30 minutes to recharge the battery.
Consider testing or replacing the battery if this happens often.
Clean corroded terminals and check battery cables for wear.
🛠️ Troubleshooting Tips
Still won’t start? The battery may be completely dead, or the alternator could be faulty.
Clicking sound only? Possible starter motor issue.
Lights dim but car won’t start? You may need more time charging or a better connection.
💡 FAQ: How to Use Jumper Cables
Q: Can I attach jumper cables in any order?
A: No — always follow the correct sequence to avoid sparks or electrical damage.
Q: Is it safe to jump-start in the rain?
A: Yes, but avoid standing in water and handle cables with dry gloves.
Q: How long should I let the donor car run before trying to start?
A: Typically 2–5 minutes of charging is sufficient.
📌 Summary: Connection Order at a Glance
| Step | Cable | Connection Point |
|---|---|---|
| 1 | Red (+) | Dead battery + |
| 2 | Red (+) | Good battery + |
| 3 | Black (–) | Good battery – |
| 4 | Black (–) | Unpainted metal on dead car |
🛒 Recommended Jumper Cables
Looking for a reliable jumper cable? Choose:
4-gauge or thicker
At least 12 feet long
Heavy-duty clamps
✅ Conclusion
Now that you know how to attach jumper cables safely, you’re prepared for a dead battery emergency. Keep a quality set in your trunk, and practice the steps so you won’t panic when it matters most.


1 comment
Avenue17 09/14/2025
Your phrase, simply charm