Whether you're fixing a headphone cable, wiring LED lights, or working on a small electronics project, knowing how to connect small wires is a basic yet essential skill. This guide walks you through safe, secure, and effective ways to connect thin or delicate wires without damaging them.
how to connect small wires
🔍 What Are “Small Wires”?
'Small wires' usually refer to:
Low-gauge wires (like 20 AWG to 30 AWG)
Signal wires used in electronics, speakers, sensors, LEDs, and hobby projects
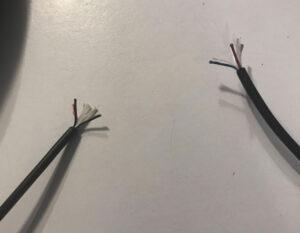
Thin stranded wires commonly found in USB cables, headphones, RC motors, etc.
Due to their size, small wires are prone to breakage, corrosion, and loose connections if not handled properly.
🔧 Tools You’ll Need
Wire stripper (preferably precision or automatic for fine wire)
Soldering iron and solder (optional, for permanent joints)
Heat shrink tubing or electrical tape
Small wire nuts or connectors (if soldering isn’t used)
Tweezers or fine-tip pliers
✅ Step-by-Step: How to Connect Small Wires
Method 1: Twist & Tape (Temporary Fix)
Best for: Low-voltage, quick repairs
Strip about 1 cm (3/8 inch) of insulation from both wires.
Twist the exposed copper strands together tightly.
Fold the twisted section flat to minimize stress.
Wrap securely with electrical tape or cover with heat shrink tubing.
⚠️ Note: This method is quick but not the most durable or safe for long-term use.
Method 2: Soldering (Recommended for Permanent Connection)
Best for: Electronics, audio cables, LED strips, etc.
Strip a short, even amount of insulation (6–8 mm).
Twist the wires together or place them side by side (depending on layout).
Heat the connection with a soldering iron and apply solder until it flows into the wire strands.
Let it cool.
Slide heat shrink tubing over the joint and apply heat to insulate.
✅ This creates a strong, low-resistance connection.
Method 3: Using Crimp Connectors or Butt Connectors
Best for: Automotive, speaker wiring, or when soldering isn’t available
Strip equal lengths on both wires.
Insert each end into the butt connector.
Use a crimping tool to firmly crimp both ends.
Tug gently to test the strength.
Insulate with shrink tubing if not already covered.
Method 4: Using Terminal Blocks or Screw Terminals
Best for: Prototyping or temporary connections
Strip 5–6 mm of insulation.
Loosen the terminal screw.
Insert the wire.
Tighten the screw to secure.
Check for firm grip.
💡 Tips for Working With Small Wires
Avoid stripping too much insulation — it weakens the wire and increases risk of short circuits.
Use fine-tip tools and helping hands for better control.
Pre-tin wires with solder before connecting if they are extremely thin or frayed.
For stranded wire, twist the strands tightly before inserting into terminals.
🧰 Applications of Small Wire Connections
Headphones and USB cable repair
RC cars or drones
LED light wiring
Arduino and Raspberry Pi circuits
Home electronics repair
📌 Common Mistakes to Avoid
Using too much heat when soldering (it melts insulation)
Leaving exposed copper uninsulated
Bending wires at the joint (causes stress and eventual break)
Not testing the connection for strength or continuity