Lamps are essential in every home—providing light, comfort, and style. But over time, the lamp cord can become frayed, brittle, or unsafe, posing a fire or shock hazard. Instead of throwing away your lamp, you can easily give it a second life by replacing the cord yourself.

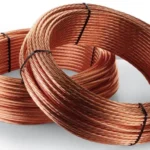
replacement cords for lamps
This guide will walk you through everything you need to know about lamp wire replacement, including the tools you’ll need, safety precautions, and step-by-step instructions.
Why Replace a Lamp Cord?
Safety: Old cords can crack, overheat, or cause short circuits.
Restoration: Keeps vintage and antique lamps functional.
Customization: Allows you to choose cord length, style, or even add a switch or dimmer.
Cost-Effective: Rewiring is cheaper than buying a new lamp.
Choosing the Right Lamp Wire
Before starting, it’s important to select the right lamp electrical cord.
Gauge (Thickness):
Most lamps use 18 AWG wire.
For larger floor lamps or higher wattage, consider 16 AWG.
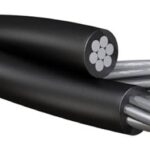
Wire Type:
SPT-1: Thinner insulation, more flexible, ideal for table lamps.
SPT-2: Thicker insulation, better durability, suitable for floor lamps.
Cord Style:
Standard clear or black PVC cords.
Braided fabric cords for a vintage look.
Cords with built-in switches or dimmers for convenience.
👉 If you’re unsure, an 18 AWG SPT-2 replacement lamp cord with plug is the most versatile choice.
Tools and Materials You’ll Need
Replacement lamp cord (with or without plug, depending on preference)
Screwdriver
Wire stripper
Electrical tape or wire connectors
Replacement lamp socket (if the old one is damaged)
Pliers
Step-by-Step: How to Replace a Lamp Cord
Step 1: Unplug and Disassemble the Lamp
Always unplug the lamp before working. Remove the lampshade and bulb, then access the socket by unscrewing it from the base.
Step 2: Remove the Old Cord
Locate where the cord enters the socket terminals. Unscrew the connections and carefully pull out the old cord through the lamp body.
Step 3: Prepare the New Cord
Measure the length you need.
Strip about 1/2 inch (12 mm) of insulation from each conductor.
If using a cord with a plug, skip attaching one manually.
Step 4: Connect the Wires to the Socket
Identify the neutral (ribbed insulation) and hot (smooth insulation) conductors.
Attach the neutral wire to the silver screw terminal.
Attach the hot wire to the brass screw terminal.
Tighten screws securely.
Step 5: Reassemble the Lamp
Feed the cord back through the lamp body, reattach the socket, and secure all parts.
Step 6: Test the Lamp
Insert a bulb, plug in the lamp, and turn it on. If everything works, your lamp is safely rewired!
Tips for Lamp Wire Replacement
Use UL-listed lamp cords for safety.
Consider a lamp cord with switch or dimmer for convenience.
For antique lamps, a braided cord can enhance appearance.
If unsure, consult an electrician.
Conclusion
Replacing a lamp cord is a straightforward DIY project that saves money, improves safety, and extends the life of your favorite lamp. Whether you’re fixing a bedside lamp, restoring a vintage table lamp, or rewiring a floor lamp, choosing the right cord and following proper steps ensures a safe and reliable repair.
Instead of discarding an old lamp, give it a fresh start with a new lamp wire replacement—a small upgrade that makes a big difference.