Ribbon cables are flat, flexible cables commonly used in electronics, computers, printers, and other devices where multiple wires need to connect neatly in a compact space. If you’re unsure how to connect a ribbon cable properly, this guide walks you through everything you need to know—from types to tools to exact steps.
how to connect ribbon cable
🧠 What Is a Ribbon Cable?
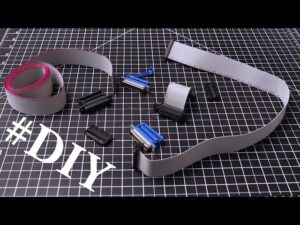
A ribbon cable (also called a flat cable or multi-wire planar cable) consists of multiple conductors running parallel to each other on a flat, flexible strip. It's designed to:
-
Organize wires neatly
-
Save space
-
Transmit multiple signals at once
You’ll often find them inside:
-
Desktop computers (e.g. IDE drives, floppy drives)
-
3D printers and CNC machines
-
Industrial control panels
-
Embedded electronics
🔌 Common Ribbon Cable Connection Methods
There are three main ways to connect ribbon cables:
| Method | Where It's Used |
|---|---|
| IDC (Insulation Displacement Connector) | Electronics, computers, printers |
| Soldered connection | DIY or custom circuit boards |
| Pin headers (male/female) | Arduino, Raspberry Pi, breadboards |
🛠️ Tools You Might Need
Depending on the connection method, gather the following tools:
-
IDC crimping tool (for IDC connectors)
-
Wire cutter/stripper
-
Soldering iron and solder (for custom boards)
-
Small screwdriver (for terminal connections)
-
Multimeter (optional for testing)
🪛 How to Connect a Ribbon Cable (IDC Method)
This is the most common and secure way to connect ribbon cables.
✅ Step-by-Step Instructions:
-
Identify the pin 1 side
The ribbon cable usually has a red stripe to indicate pin 1. Match this with pin 1 on the connector or board. -
Insert ribbon cable into IDC connector
Make sure the cable is fully inserted, aligned evenly, and not twisted. -
Crimp the connector
Use an IDC crimping tool or a vice to press the connector together until it 'clicks' and bites through the insulation. -
Secure the strain relief
Many IDC connectors have a strain relief bar—press it into place to lock the cable in. -
Connect to header or socket
Align and plug the connector into the corresponding header on your board or device.
🧪 Tip: How to Test the Connection
Use a multimeter in continuity mode to test each wire from one end of the ribbon cable to the corresponding pin on the connector. This ensures proper alignment and electrical continuity.
🧯 Common Mistakes to Avoid
-
Forgetting pin alignment: Always match pin 1 (red stripe) with the correct header orientation.
-
Uneven crimping: Can cause misalignment or signal failure.
-
Over-stripping or damaging wires: Leads to weak or broken connections.
-
Incorrect connector size: IDC connectors must match the cable width (e.g. 10-pin, 20-pin, etc.)
🧰 Advanced Options
-
Custom length cables: You can cut ribbon cables to size and apply new IDC connectors as needed.
-
Solderable headers: Good for permanent DIY projects.
-
ZIF (Zero Insertion Force) connectors: Used for delicate ribbon cables in laptops and camera modules.
📌 Conclusion
Connecting a ribbon cable isn’t difficult once you know the basics. By following these steps and using the right tools, you’ll ensure a solid connection for your project or repair.
✅ Recap:
-
Match pin 1 with the red stripe
-
Use IDC connectors for secure, tool-based crimping
-
Avoid misalignment or over-crimping
-
Test your connection before use


